

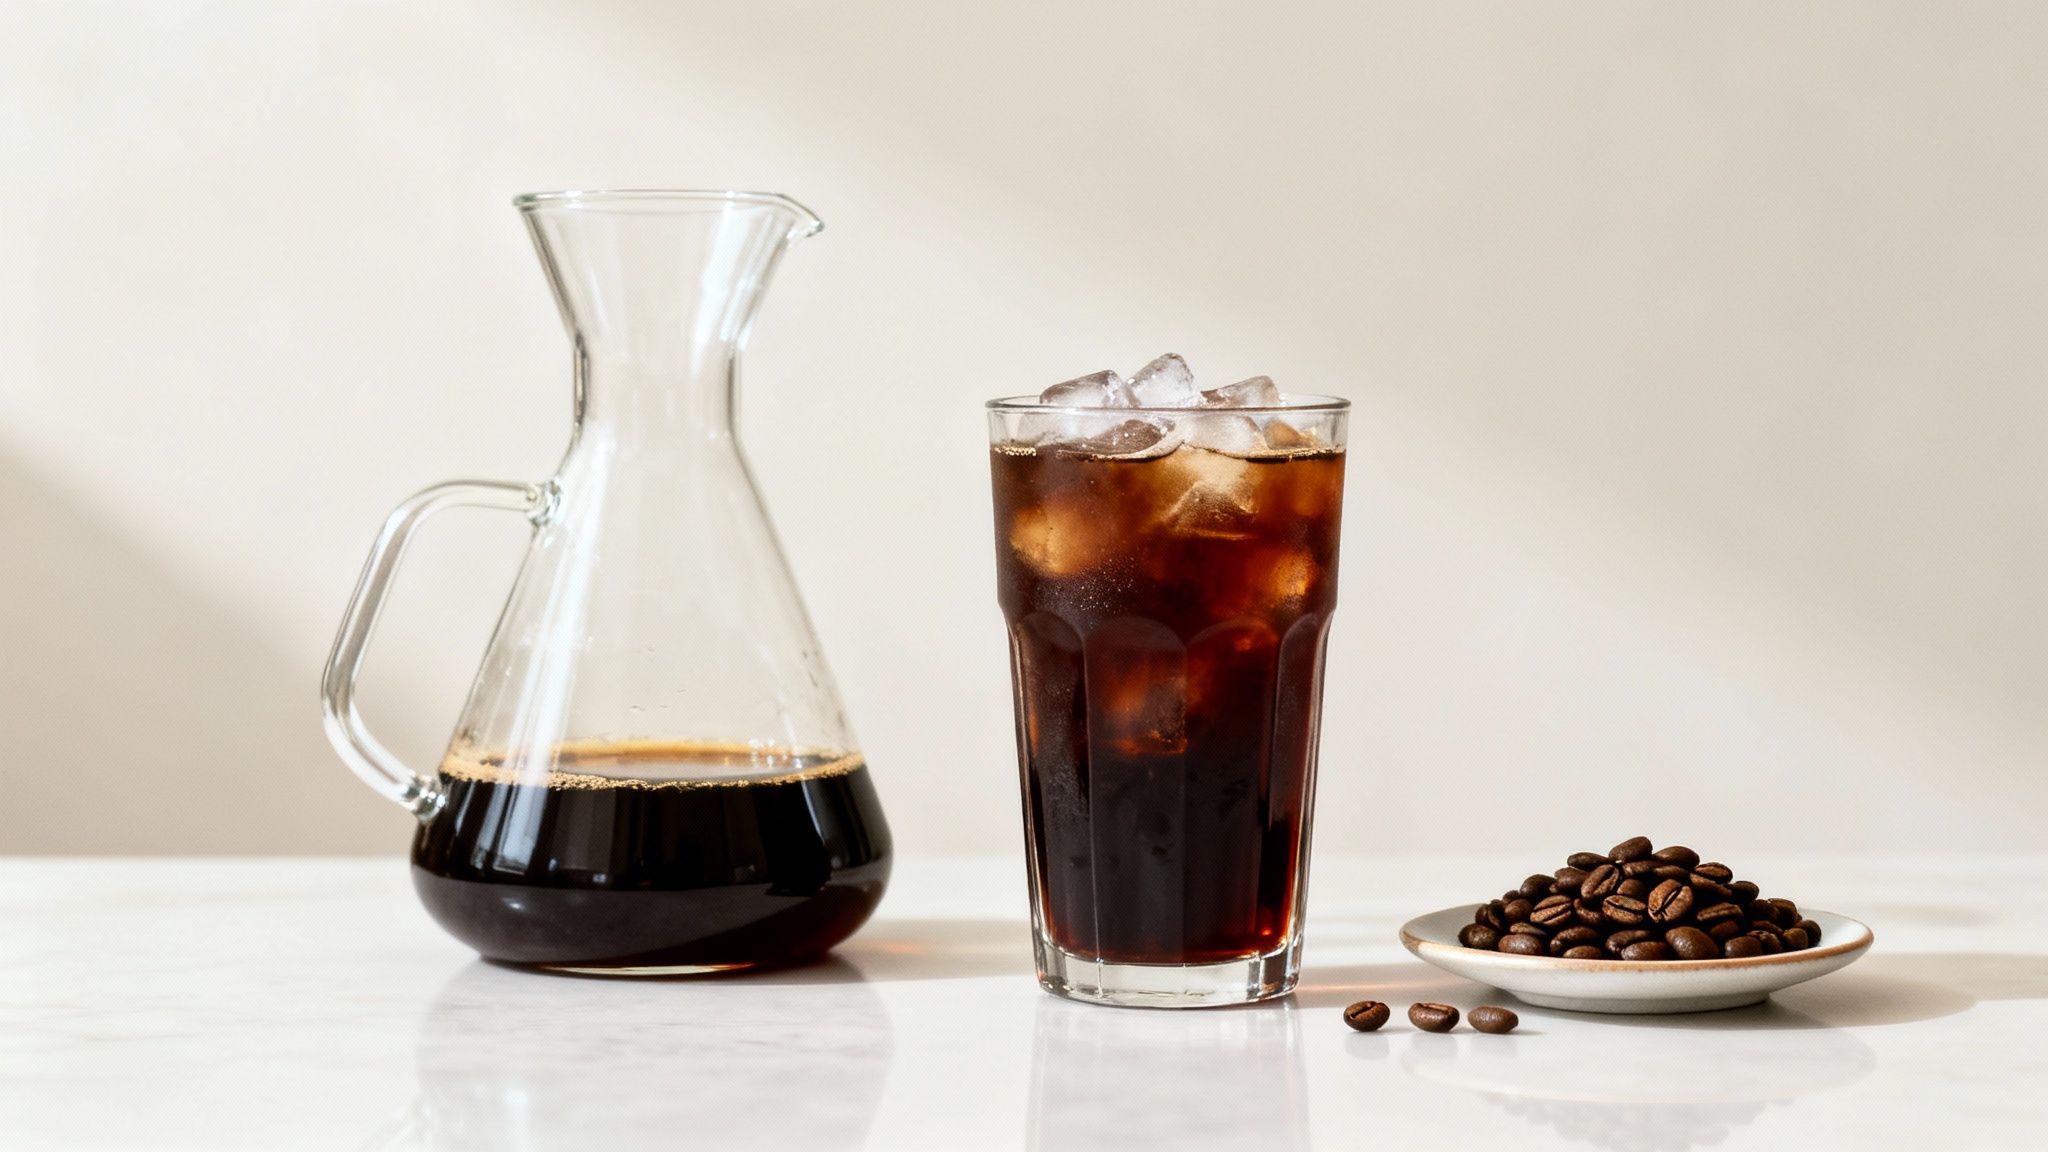
How to Make Cold Brew Coffee Perfectly Every Time
Making cold brew is beautifully simple: you just steep coarsely ground coffee in cold water for a long time—anywhere from 12 to 24 hours. The real magic is in that slow, gentle extraction. It pulls out all the smooth, naturally sweet flavors from the beans, leaving the harsh acidity behind. This guide will walk you through everything, but if you're looking for other brewing methods, we have guides on everything from French press to pour-over, each unlocking a different side of your favorite coffee beans.
Why Cold Brew Is More Than Just a Trend
If you've ever found a cup of hot coffee a bit too bitter or acidic for your taste, cold brew could be a total game-changer. Unlike your typical drip machine or pour-over that uses scorching hot water to quickly extract flavor, cold brewing is all about patience. This slow, cool process avoids the chemical reactions that release those bitter compounds and oils, resulting in a brew that’s incredibly easy on the palate.
But the benefits are about more than just a refreshing drink on a hot day. The unique flavor profile is a huge part of its massive popularity. By ditching the high heat, cold brewing preserves the delicate, nuanced notes locked inside the beans.
And this isn't just a niche trend. The global cold brew coffee market is booming, jumping from USD 506.1 million in 2023 to a projected USD 1,751.6 million by 2030, according to market analysis by Grand View Research. This incredible growth shows a real shift in how we're all thinking about and enjoying our daily coffee.
Unlocking a World of Flavor
One of the best parts about making your own cold brew is how it showcases the unique personality of different coffee beans. Hot water can sometimes blast away the subtler notes, but the cold brew method lets them come through with stunning clarity. It’s the perfect stage for appreciating the distinct tastes from all over the coffee-growing world.
Coffee beans from different regions have unique characteristics. Latin American coffees often have notes of chocolate and nuts, while African coffees are known for their bright, fruity, and floral tones. Asian coffees can be earthy and full-bodied. You’ll start to notice things like:
- Rich, Chocolatey Notes: Beans from places like Peru can develop these deep, sweet flavors that remind me of dark chocolate or toasted almonds.
- Bright, Fruity Undertones: Our Ethiopian beans, which are famously bright and floral when brewed hot, transform into a clean, sweet brew with hints of berry and citrus.
- Earthy, Syrupy Sweetness: A coffee from Bali might reveal a full-bodied, almost syrupy texture with a smooth, spicy finish.
Learning to make cold brew at home is like getting a front-row seat to the incredible diversity of single-origin coffee. It’s a simple technique that produces a truly sophisticated result, turning your daily cup into a flavor exploration.
This brewing style is practically an invitation to experiment. When you start with high-quality beans, you’re not just making a drink; you’re tasting the authentic flavor profile that the farmers and roasters worked so hard to create. You can dive deeper into how origin impacts taste in our guide to famous coffee-growing regions. Mastering this easy method is your first step toward elevating your coffee game and discovering why cold brew is so much more than a passing trend. Why wait? Find the perfect beans for your next brew on our site and make a purchase today!
Gathering Your Essential Cold Brew Gear
The best part about making cold brew at home? You don't need a counter full of fancy, expensive gadgets. The real beauty of this method is its simplicity, and I'd bet you already have almost everything you need hiding in your kitchen cabinets. It's less about high-tech gear and more about using basic tools to create something exceptional.
This isn’t like dialing in a perfect shot of espresso. Cold brewing is a far more forgiving and patient process. It’s this accessibility that has convinced so many of us to ditch the daily coffee shop run and bring this favorite right into our own homes.
The Basic Brewing Toolkit
At its heart, making fantastic cold brew only requires a few key pieces. You're not buying a new appliance, just finding a new purpose for some kitchen staples.
Here’s the simple setup I recommend:
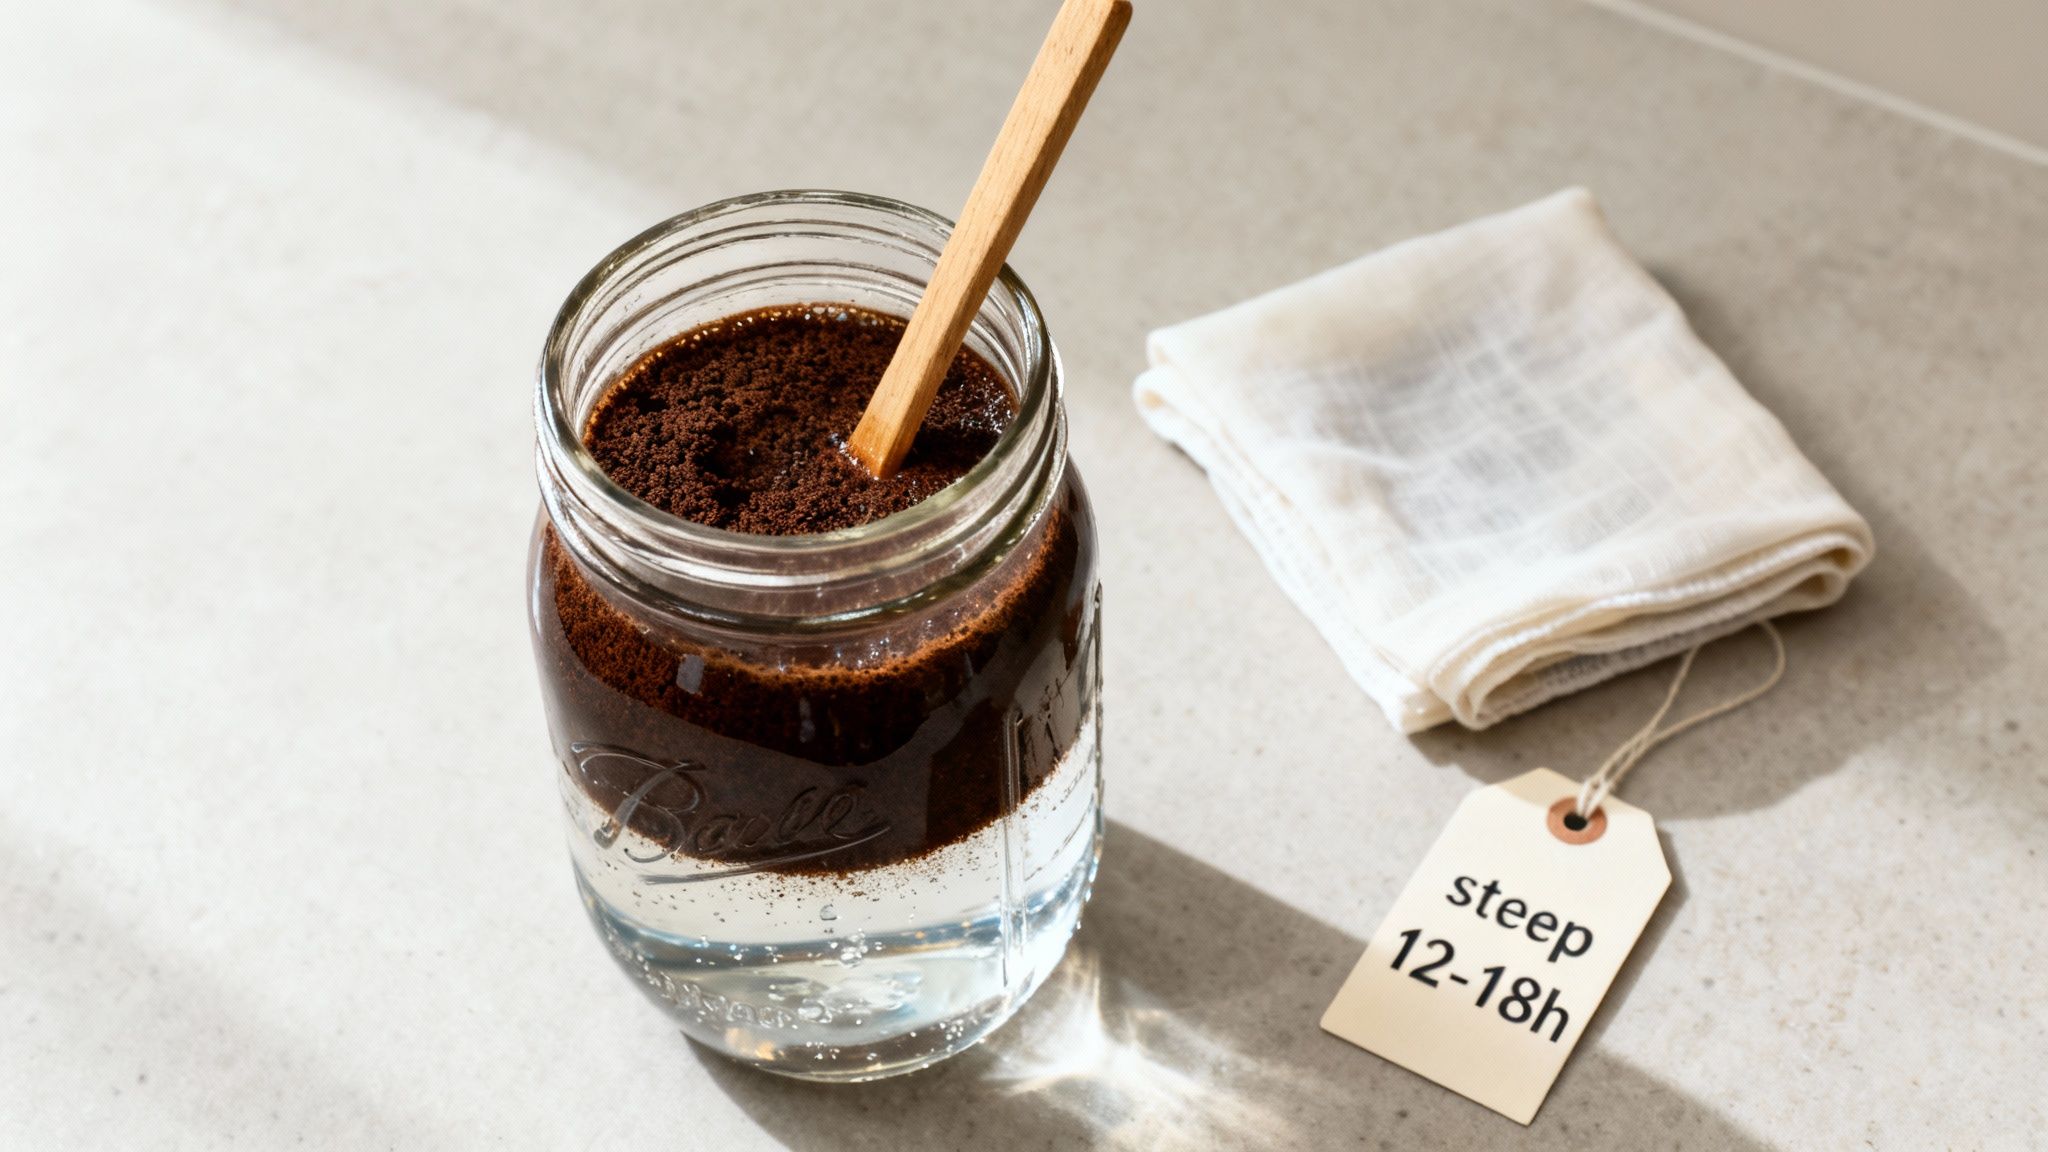
- A Brewing Container: Honestly, anything large enough to hold your coffee and water will do the trick. A 32-ounce (or larger) mason jar is my go-to. The wide mouth makes it a breeze to fill and clean, and the lid seals everything up nicely for the long steep.
- A French Press Alternative: If you happen to have a French press, you’re in luck—it's a perfect all-in-one cold brew system. Just steep the grounds right in the carafe, and when it's done, press the plunger down to filter. It really couldn't be easier.
- A Grinder (Seriously, Get One): Look, you can use pre-ground coffee, but grinding your beans fresh right before you brew will completely change the game. A burr grinder is the gold standard for getting that perfect coarse grind, but a simple blade grinder will absolutely work when you're starting out.
Choosing Your Filtration Method
Once your coffee has steeped for 12-24 hours, it’s time to separate that beautiful, smooth liquid from the spent grounds. The goal is a super-clean, sediment-free brew, and a few different methods will get you there.
One of the most straightforward ways is to line a fine-mesh sieve with a piece of cheesecloth. Just set it over a clean pitcher or jar and slowly pour the steeped coffee through it. The cheesecloth is fantastic at catching all those tiny particles, leaving you with a silky concentrate. No cheesecloth? A clean, thin kitchen towel or even a couple of regular paper coffee filters will do the job just fine.
It’s not about how fancy your gear is. The two things that truly matter are the quality of your coffee beans and getting the right coarse grind. Nail those, and even a simple mason jar will give you an amazing batch of cold brew.
The Most Important Piece of the Puzzle: Your Coffee
While the right tools set the stage, the coffee beans are undeniably the star of the show. The cold brew process is gentle and slow, which means it pulls out and highlights the core flavors of the beans you choose. This is where you really get to play and customize. A coarse grind is non-negotiable—you're looking for a texture similar to coarse sea salt. This grind size is crucial for preventing the over-extraction that leads to bitterness and makes filtering a whole lot cleaner.
Because this brewing method is so delicate, it's a phenomenal way to explore the unique, subtle flavors of different single-origin coffees. Our Beans Without Borders Bali Blue is a fantastic place to start; it makes a classic, rich cold brew with deep notes of dark chocolate and vanilla. If you're after something a bit brighter and more adventurous, our Ethiopian Yirgacheffe is incredible, producing a brew bursting with floral and citrus notes.
Ready to find your go-to bean? Explore our full collection of single-origin and blended coffees and start experimenting. Each one offers a completely different experience, turning your daily cold brew into a small ritual of discovery. Click the link and make your purchase now to start your flavor journey.
Dialing in Your Grind and Ratio
With your gear sorted, it's time to get into the two elements that truly define your cold brew's final character: the grind size and the coffee-to-water ratio. Getting these right is the key to unlocking a consistently fantastic brew every single time. This is where you move from just making coffee to crafting it.
Think of it this way: the grind size controls how the water extracts flavor, while the ratio determines how much flavor gets pulled out. They work in tandem, and mastering both is your ticket to cold brew heaven.
Why You Must Use a Coarse Grind
If there's one golden rule in making cold brew, it's this: use a coarse grind. Seriously, this is non-negotiable. You're looking for a texture similar to coarse sea salt or raw sugar. Anything finer, like what you’d use for drip coffee, will result in a sludgy, bitter, and over-extracted mess.
Why is this so important?
- It Slows Down Extraction: Coarse grounds have less surface area, which is exactly what you want for a long, slow steep. This gentle extraction process is what gives cold brew its signature smooth, low-acid profile.
- It Prevents Bitterness: Fine grounds extract way too fast, pulling out all the bitter compounds you want to leave behind. A coarse grind keeps things sweet and balanced.
- It Guarantees a Clean Cup: Filtering coarse grounds is a breeze. You'll avoid that nasty sediment at the bottom of your glass, ensuring a clean, grit-free drinking experience.
No grinder? No problem. Just ask your local coffee shop to grind the beans for you, or select the "coarse" option when ordering online. For the best flavor, try to use pre-ground coffee as quickly as you can.
This simple illustration shows you just how straightforward the process is.
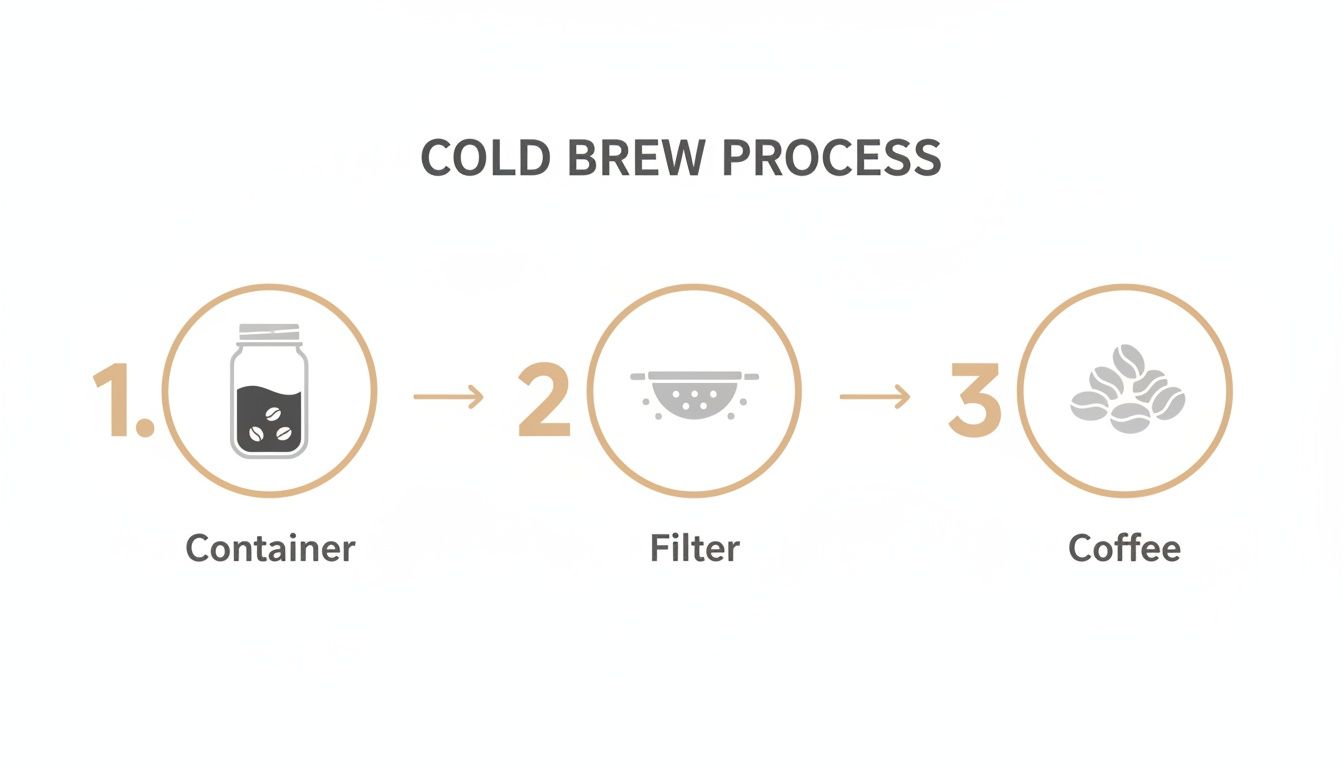
As you can see, it really just comes down to three things: a container, a filter, and—most importantly—great coffee.
Choosing Your Perfect Coffee-to-Water Ratio
The ratio of coffee to water is what determines the final punch of your brew. You really have two main paths you can go down: making a brew that’s ready to drink straight away, or creating a powerful concentrate that you can dilute later on.
There’s no "right" answer here—it all comes down to how you like your coffee. These guidelines are a great starting point, but don't be afraid to tweak them until you land on what you love.
Cold Brew Ratio Guide: Ready-to-Drink vs. Concentrate
To help you decide, here's a quick comparison of the two most common approaches.
| Attribute | Ready-to-Drink Brew (1:8 Ratio) | Cold Brew Concentrate (1:4 Ratio) |
|---|---|---|
| Measurement | 1 part coffee to 8 parts water (e.g., 1 cup grounds to 8 cups water) | 1 part coffee to 4 parts water (e.g., 1 cup grounds to 4 cups water) |
| Flavor Profile | Milder, smoother, and perfect for pouring directly over ice. | Bold, intense, and robust. This definitely needs to be diluted. |
| Best For | A quick and easy glass of cold brew without any fuss. | Crafting lattes, cocktails, or coffee-based recipes. Also a great space-saver in the fridge. |
| Steep Time | 12-18 hours | 18-24 hours |
Ultimately, choosing your ratio depends entirely on your end goal. Do you want something you can grab and go, or do you prefer a versatile base for other drinks?
For the most consistent results batch after batch, I highly recommend using a kitchen scale. For a 1:8 ready-to-drink brew, you could use 90 grams of coffee and 720 grams of water. For a more potent 1:4 concentrate, you'd use 90 grams of coffee with 360 grams of water. This precision takes the guesswork out of it.
If you’re looking for beans that have been hand-picked to make an exceptional cold brew, check out our specially curated cold brew coffee options. Don't just browse—click to purchase and experience the difference premium beans make.
The Simple Immersion Brewing Method
Alright, you’ve got your perfectly coarse grounds and you know your coffee-to-water ratio. Now for the fun part: putting it all together. We're using the immersion method, which is by far the easiest and most popular way to make killer cold brew right in your own kitchen. There are no fancy gadgets or complicated steps—just coffee, water, and a little bit of patience.
This is where the magic happens. By simply mixing your coarsely ground Beans Without Borders coffee with cold, filtered water, you're starting that slow, gentle extraction that gives cold brew its signature smooth flavor. The best part? It's an incredibly forgiving process, so it's perfect whether this is your first batch or your hundredth.
Combining Your Coffee and Water
First things first, add your coffee grounds to whatever you're brewing in—a big mason jar, a pitcher, or even a French press will do the trick. Then, slowly pour your cold, filtered water over the grounds, sticking to the ratio you decided on earlier.
You'll notice the grounds will try to float and form a crust on top. To make sure every last bit of coffee is working for you, grab a long spoon and give it a gentle stir. Your goal is to break up any dry clumps and get all the grounds fully saturated. This simple stir ensures a much more even and flavorful extraction.
Where to Steep: Countertop vs. Refrigerator
Now, you have a choice to make. You can let your coffee steep on the countertop at room temperature, or you can pop it in the fridge. There’s no right or wrong answer here; it just comes down to the flavor profile you're after.
- Countertop Steeping: Brewing at room temp speeds things up a bit. It tends to pull out more of the complex, brighter notes from the beans, giving you a brew with a bit more nuance. If you go this route, aim for a steep time of 12 to 18 hours.
- Refrigerator Steeping: Chilling your brew slows the extraction way down. The result is an incredibly smooth, mellow, and often sweeter coffee with almost no acidity. For a refrigerated brew, you’ll want to let it go for 18 to 24 hours to get the right strength.
Personally, I almost always steep on the counter. I find it really showcases the unique character of single-origin beans—like the bright, fruity notes in our Ethiopian coffee or the deep, chocolatey goodness of our Peruvian selection.
The best way to figure out what you like is to experiment. Try making two smaller batches of the same coffee, steeping one on the counter and one in the fridge. It’s a great way to taste the difference a small change can make.
This simple brewing method is tapping into a huge consumer trend. The organic cold brew market is one of the fastest-growing segments in coffee, with a projected compound annual growth rate of 19.22% through 2030. People want high-quality, sustainable options, which is exactly what we’re all about at Beans Without Borders. If you’re curious, you can discover more insights about the cold brew market and its incredible growth.
So, whether you choose the counter or the fridge, just cover your container and let time do the heavy lifting. The hardest part is waiting.
For more hands-on brewing tips and an exclusive 10% discount on your first bag of coffee, be sure to sign up for our newsletter. It’s the best way to continue your coffee journey with us.
Filtering, Storing, and Serving Your Cold Brew
You've waited patiently for 12 to 24 hours, and now it's time for the big payoff. Your cold brew has finished steeping, but the journey from that murky, coffee-ground slurry to a crystal-clear, silky-smooth drink isn't quite over. This next part is all about the finishing touches: filtering out the grit, storing it for later, and finally, pouring that perfect cup.
The goal is pretty straightforward—we need to separate the beautiful coffee from the spent grounds. A clean, sediment-free cup is what defines a great cold brew, and getting there is easier than you might think.
Achieving a Silky Smooth Texture
How you filter your cold brew really depends on the equipment you started with. Don't worry, though; each method works great for getting that super-clean, smooth texture we're all after.
If you used a French press, you're in luck. This is the easiest method by far. Just slowly and steadily press the plunger all the way down. This traps the grounds at the bottom, letting you pour the finished cold brew right into your storage container. Simple as that.
For those who steeped in a mason jar or a simple pitcher, you'll need a fine-mesh sieve. To really make sure no grit gets through, I recommend lining the sieve with cheesecloth or even a regular paper coffee filter. Set it over a large bowl or another pitcher and pour the steeped coffee through it. Let gravity do the work here—pouring too fast can stir up the sediment you're trying to get rid of.
Take your time when filtering. A slow, gentle pour is your best friend for preventing those tiny, bitter coffee particles from ending up in your finished brew. A little patience here makes a massive difference in the clarity and taste of the final product.
Proper Storage for Lasting Freshness
Once it's filtered, your cold brew is ready to chill out. The best way to keep it tasting great is in an airtight container in the fridge. A sealed mason jar, a glass bottle with a swing-top lid, or any pitcher with a cover that seals tightly will do the trick.
Kept this way, your cold brew concentrate will stay fresh for up to two weeks in the refrigerator. This is one of the best things about making a big batch—you've got amazing coffee ready to go for days. The flavor might evolve a little over that time, but it'll stay smooth and delicious.
Creative Ways to Serve Your Cold Brew
Alright, this is the best part: actually enjoying the coffee you made. Pouring it over ice is a classic for a reason, but there are so many other ways to serve it, especially if you made a strong concentrate. Let's look at a few coffee-shop-worthy drinks you can now whip up in your own kitchen, from a simple cold brew latte to a decadent mocha or even a bold affogato.
It's no surprise that cold brew has become a global favorite. While North America is still the biggest market for it, its appeal has spread everywhere. In the United Kingdom, for example, up to 43% of coffee drinkers now enjoy cold brew at least once a month. It’s a full-blown phenomenon, and you can dive deeper into its rise in this detailed market report on cold brew trends.
Here are a few ideas to get you started:
- The Classic Cold Brew: For a strong, refreshing cup, mix one part cold brew concentrate with one part cold, filtered water. Pour it over ice, and you've got a bold, smooth coffee that's way less acidic than its hot-brewed cousin.
- Creamy Cold Brew Latte: Grab a glass and fill it with ice. Add one part cold brew concentrate, then top it off with two parts of your milk of choice. Whole milk, oat, and almond milk are all fantastic options. A quick stir, and you have a rich, creamy latte.
- Sweet and Flavored Brews: Your concentrate is the perfect blank canvas. Stir in a splash of vanilla syrup for a Macchiato-style drink, or add chocolate for a Mocha. You can get creative with different milks too, from rich half-and-half (for a Breve) to nutty macadamia milk.
Serving your creation in the right cup just makes the experience better. Pour your cold brew into one of our mugs designed to make your daily ritual feel special. Find the perfect one for your new favorite drink by checking out the full collection of Beans Without Borders mugs on our site. Homemade coffee this good deserves to be enjoyed in style. Don't hesitate to purchase your new favorite mug!
Got Cold Brew Questions? We've Got Answers.
Even for something as simple as cold brew, a few questions always pop up when you're dialing in your technique. Getting your brew from "pretty good" to "absolutely perfect" often comes down to a little troubleshooting.
Let's walk through some of the most common hurdles so you can nail your home brew every single time.
"Can I Use Hot Water to Speed Things Up?"
It’s a tempting shortcut, right? Maybe a little hot water to get the extraction started? For true cold brew, the answer is a hard no. The whole point—the magic, really—is the slow, gentle extraction that only cold water provides.
This process is what gives cold brew its famously smooth, sweet, and low-acid profile. It deliberately leaves behind the bitter compounds that hot water yanks out of the grounds. Adding heat at any stage, even for a quick "bloom," changes the entire chemical reaction and defeats the purpose. Stick with cold or room-temp water from start to finish.
"Help! My Cold Brew Tastes Weak."
Watery, lackluster cold brew is a common complaint, but thankfully, it's almost always a simple fix. Your problem likely lies in one of three areas.
- The Ratio: This is the most common culprit. Are you using enough coffee? For a strong concentrate you'll dilute later, you need a bold ratio like 1:4. If you're aiming for a ready-to-drink brew, you might use something closer to 1:8, but if it tastes weak, you just need to add more coffee.
- The Grind: The grind size is critical. If your coffee is ground too finely, it can turn into a sort of sludge that prevents water from circulating and extracting flavor properly. You're looking for a coarse grind—think the texture of rough sea salt.
- The Steep Time: Patience is key. Cold brew needs time to work its magic. If you’re pulling it too early, you're not getting the full flavor. While 12-18 hours is a good starting point, if your brew is weak, don't be afraid to let it steep for a full 24 hours. That extra time can pull out a ton of rich, delicious character.
"Which Coffee Beans Should I Use?"
You can make cold brew with any bean, but the cold, slow steeping process definitely plays favorites. Medium and dark roasts are a classic choice for a reason—their deep chocolatey and nutty notes become incredibly smooth and bold.
That said, the low acidity of cold brewing is also a fantastic way to explore single-origin light roasts. It strips away the sharp bite hot water can sometimes create, letting delicate floral and bright fruit notes shine through in a way you may have never experienced.
Want a recommendation? For a foolproof, classic cold brew, you can't go wrong with our Beans Without Borders Peru or Bali single-origin coffees. If you're up for an adventure, the Ethiopian will blow you away with clean, bright fruit notes that are stunning when cold brewed. Go ahead and click to purchase one of these incredible coffees!
"What’s the Difference Between Cold Brew and Iced Coffee?"
This is a great question, and the answer is everything! While they both end up cold in a glass, they are two completely different drinks at their core.
Iced coffee is just standard coffee brewed with hot water and then cooled down, usually by pouring it over ice. This often leads to a watered-down, and sometimes bitter, final product.
Cold brew, on the other hand, never sees heat. The coffee grounds steep in cold water for 12-24 hours. This fundamentally different process creates a coffee concentrate that is dramatically smoother, naturally sweeter, and up to 67% less acidic than its hot-brewed cousin. They aren't just two ways to make cold coffee—they're two distinct beverages.
Your journey into exceptional home-brewed coffee has just begun. At Beans Without Borders, we believe the best coffee is discovered at the end of a dirt road, not in a warehouse. We invite you to explore our collection of fresh, small-batch beans from the world's most celebrated growing regions. Find your next favorite coffee and taste the difference that quality and care can make. Be sure to sign up for our e-mail list for exclusive offers and news!
Discover Your Perfect Coffee at Beans Without Borders